
When it comes to boating, having a well-organized and properly wired switch panel is absolutely vital for the seamless operation of various electrical systems on board. Whether you’re a seasoned boater with years of experience or a complete novice just starting out, acquiring the knowledge and skills to wire a boat switch panel is an incredibly valuable asset. It enables you to ensure the safety of everyone on board and the convenience and control needed for an enjoyable boating experience.
This comprehensive article will provide a detailed, step-by-step guide covering everything you need to know about effectively wiring a boat switch panel. By the end of this read, you’ll be equipped with the confidence and expertise to tackle this important task with ease and precision.
What You Will Need
1. Battery: A battery is needed to power the panels and all the accessories you want to connect to the panel switch. You can use your boat battery or an external battery, but it’s recommended to use the boat battery.
2. Marine Wire: Wire is necessary to connect the panel and circuits. You can use regular wire, but it’s recommended to use tin foil Marine Wire because it has a thicker coating and flexibility, and it is corrosion-free. Depending on your boat, you can use an eight-gauge or six gauges.
3. A Switch Panel: Switch Panel comes in various types. Choose a switch panel with LED lights on it for visibility at night. Also, make sure it has enough switches to fulfill your needs. Also, Ensure it comes pre-wired, so you don’t have to waste time wiring the button.
4. Fuse Panel: Most Switch panels have fuses installed on the back, but it’s recommended to use a separate fuse panel for a more convenient and clean connection.
5. Circuit Breaker: Most Switch panels come with circuit breakers. But it’s recommended to use a separate one.
6. A Wire Stripper: You can use a regular wire stripper, but it’s recommended to get one that has an adjustable blade for the different sizes of wires
7. Battery Isolator: This is a must-have if you want to power your switch panel from the battery.
8. A Wire Cutter: Your wire stripper might come with this too, but using a separate one is recommended.
Wiring the Boat Switch Panel
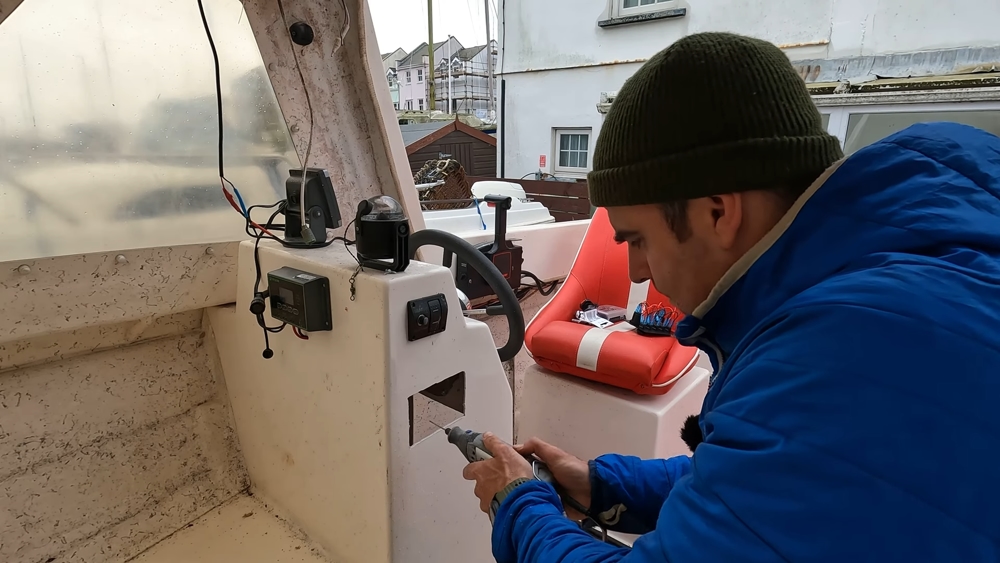
1. Plan your Switch Panel
Firstly you should take place for the new switch panel on your boat. To do this, cut a box size on your boat according to the switch panel and ensure wires are easily accessible where you want to install the switch panel. Once the area is cut, don’t put the board in it just yet. We still have wiring to do before screwing the switch panel onto the boat.
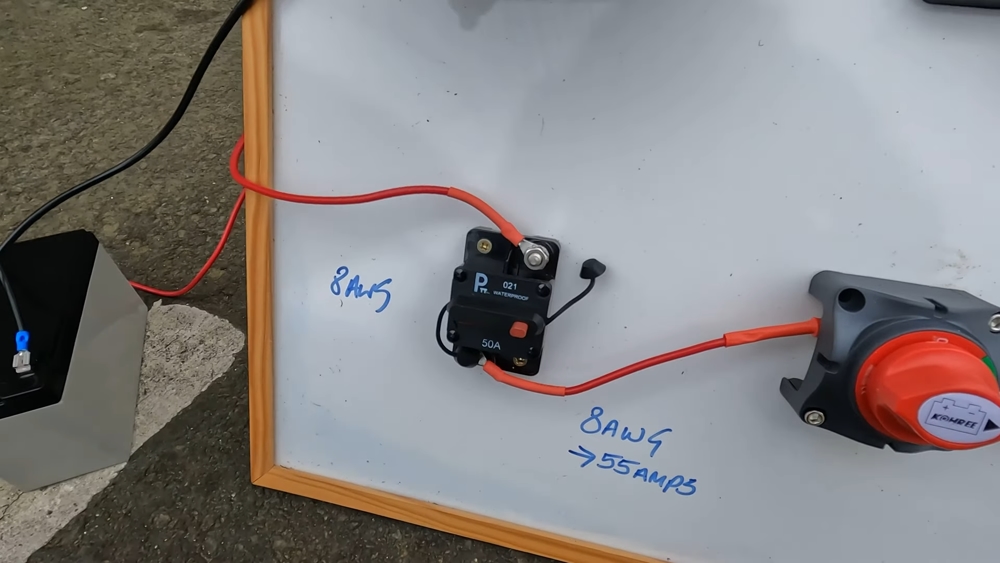
2. Connect the Circut Breaker With the Battery
We don’t want to connect the Switch panel directly to the battery because it will permanently drain our battery, and not having a circuit breaker can be dangerous.
A circuit breaker is necessary to protect the wire and other electric devices from getting burnt. So you have to take your wire and connect one end to the positive terminal of the battery and the other end to the circuit breaker. You can find a circuit breaker in any hardware store at a reasonable price.
Once you’ve connected your wires to the battery and the circuit breaker, you can connect the second end to the battery isolator using wire.
The battery isolator is a device that prevents the engine from draining your boat’s batteries. It does this by only allowing electricity to flow in one direction, and it comes with two wires for you to connect to the engine. It should be installed where it can easily reach both batteries and the switch panel, like on top of your boat’s dashboard.
3. Connect to the Fuse Panel
Connect the Battery isolator to the fuse panel using a wire. Make sure to connect to the positive end of the fuse panel. Some switch panels have built-in fuses, but using a separate Fuse Panel is more convenient.
We have Connected our battery positive Terminal to the fuse panel passing through the circuit breaker and battery isolator. It’s now time to work on the negative terminal of the battery.
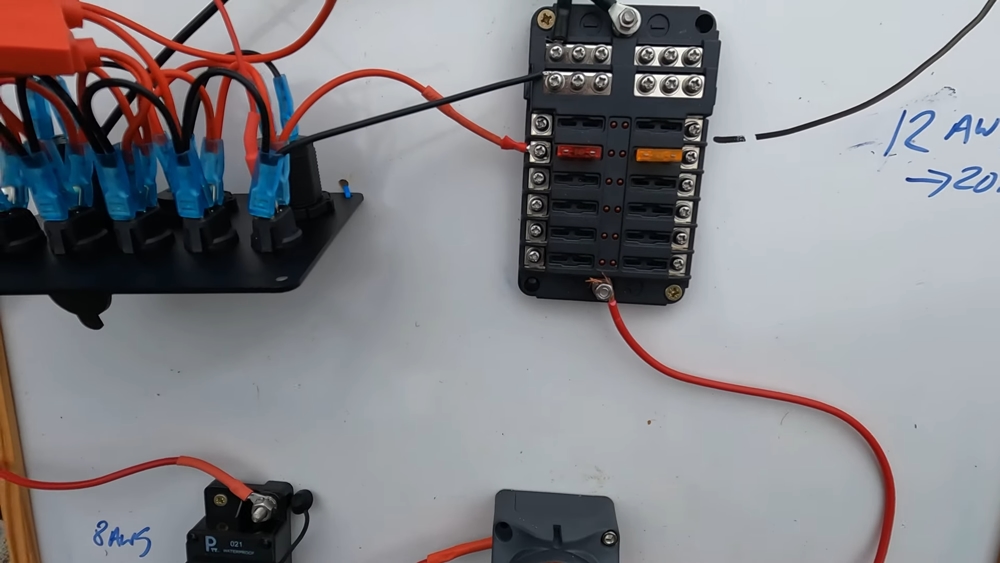
4. Connect the Switch Panel with the Fuse Panel and Battery
Use your marine-grade wire and connect one end to the negative terminal of the battery and the other end to the opposing end of the fuse panel, and our fuse panel is now ready.
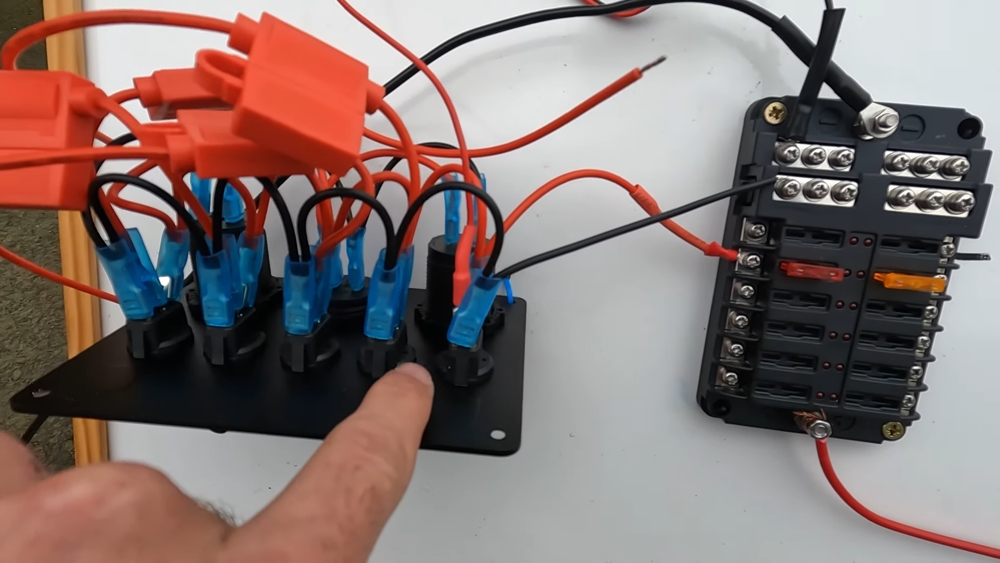
Now we can connect our Switch panel to the fuse panel. To do this, we’ll first need to join the red wire from the switch panel to a positive terminal of our fuse panel.
Now, we can connect the black wire from that same switch panel to one of the negative terminals of the fuse panel. And we’ll do that by wrapping it around the terminal and securing it with a wire nut.
After that, our switch panel is ready to be connected to various accessories we want to power.
5. Connecting Accessories to the Switch Panel
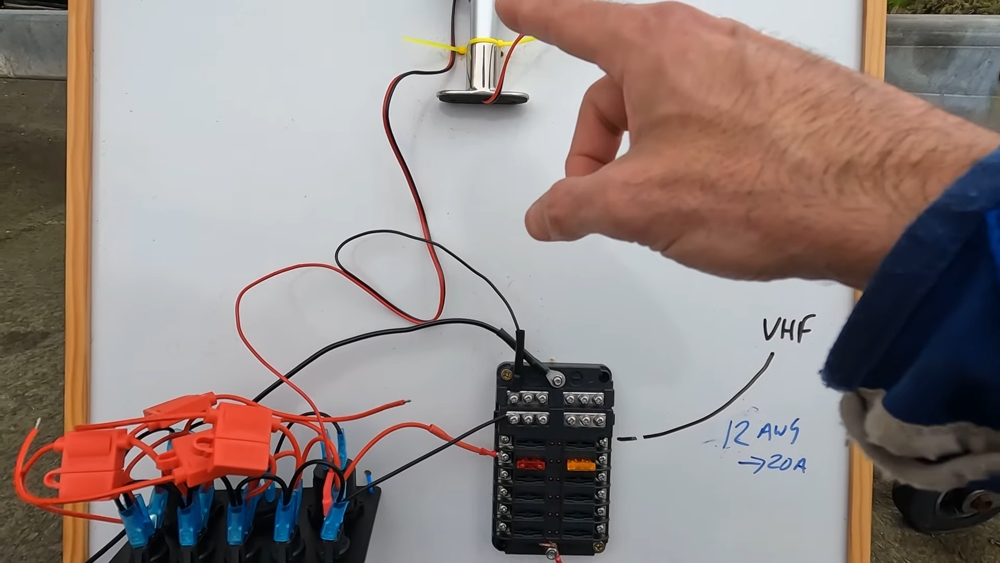
Now, to connect accessories, you must take the negative wire from the accessories you want to power and connect it to one of the negative terminals on the fuse panel. And join the positive wire with the red(positive) on the switch panel. That’s all there is to it.
Now that you’ve got the basics of wiring accessories, You can put the switch panel into your boat, and you’re all done.
Testing and Troubleshooting
After completing the wiring process, it’s crucial to test the switch panel and all connected components. Reconnect the boat’s battery and test each switch to verify that the corresponding component turns on and off as expected. Use a multimeter to check for proper voltage and continuity. If any issues arise, troubleshoot the wiring connections and address them promptly.
Ensuring Safety Measures
Safety should always be a top priority when working with boat electrical systems. Ensure that all wiring connections are secure, insulated, and protected from moisture. Use circuit breakers or fuses to prevent electrical overloads and potential fire hazards. Regularly inspect and maintain the switch panel and wiring to ensure their integrity.
Maintenance and Upkeep Tips
To keep your boat switch panel in optimal condition, follow these maintenance tips:
- Regularly inspect the wiring connections and components for any signs of wear, corrosion, or damage.
- Clean the switch panel and switches regularly using a mild cleaner and a soft cloth.
- Test the functionality of the switches and electrical components before each boating season.
- Keep a record of the wiring diagram and switch panel layout for future reference or troubleshooting.
Common Mistakes to Avoid
Avoid these common mistakes when wiring a boat switch panel:
- Neglecting proper wire sizing for each electrical component.
- Failing to use marine-grade wires and connectors.
- Overloading circuits by connecting too many components to a single switch or fuse.
- Ignoring safety precautions, such as using circuit breakers or fuses.
FAQs
Where do you put the Fuse Panel?
It depends on how many accessories you want to power and how much space is available. If there’s not a lot of room, then You can use a single panel. If you want to power more than one accessory or there’s plenty of space, then multiple panels are the way to go.
So you can put the fuse panel anywhere you like. It’s up to you where it goes and how many boards are used. The important thing is to wire it correctly.
How much does a Switch Panel installation cost?
It’s hard to give you a price because it depends on how many accessories are needed and where the panel is located. It could be anywhere from $100 to over $500, depending on the boat.
The average cost for a single panel is about $200, but it could be as little as $100 or up to $400, depending on the accessories and how much work needs to be done.
If you need more than one panel, it will cost a lot more because of the installation work and accessories.
What do I need to know about Installing a Switch Panel?
There are several things you need to know. First, you must have a good understanding of how electricity works and what it can do. You should also understand the importance of safety when working with electricity. If you don’t know how to work with electrical systems, it’s best to hire a professional to help you.
How do I know which wire is positive and which is negative?
In most cases, red wires are positive, and black or yellow wires are negative. However, it’s always best to refer to the manufacturer’s instructions or use a multimeter to confirm polarity.
Can I use a regular switch panel instead of a marine-grade one?
It is highly recommended to use a marine-grade switch panel specifically designed for boat applications. Marine-grade panels are built to withstand the harsh marine environment and are more durable and corrosion-resistant.
What if I need to add more switches in the future?
If you need to add more switches in the future, plan the wiring layout accordingly during the initial installation. Leave extra space on the switch panel and ensure that the electrical system can accommodate additional components.